

Once upon a time, in one of my projects, I had a feature that used Camera and ARCore (for Kotlin). Initially, using ARCore and modifying code from the quickstart page was sufficient. However, as the app evolved, we wanted to make this feature a flagship component. This required extensive knowledge of ARCore and graphics. There was no time, and I didn’t make this improvement.
But before we forgot the idea, I discovered that the same feature could be implemented in Unity with less effort, although it would still take time to learn Unity. The best part was that I could export this feature later and use it in the app.
History became legend. Legend became myth.
But now, I’m returning to explore this feature and see if it can be integrated into the app.
While I won’t be implementing the original feature I mentioned, this article will serve as a starting point for our Unity journey. I encountered many strange and silly problems while trying to run Unity as a library, so it’s essential to document these challenges for future adventurers.
En avant!
Project creation
We will start with a Geospatial sample project inside Unity. There are a few excellent videos about this topic on YouTube, so I won’t repeat their content. However, I’ll mention some issues I encountered.
Here are the links (Link 1, Link 2). You can choose either one, but I recommend starting only after reading this chapter to save yourself some time.
Start your project as a 3D (Built-In Renderer Pipeline). If you, like me, have just downloaded Unity for the first time, you might choose the wrong project type, which could lead to additional issues, such as a black screen after the build. (They are fixable, but let’s be more efficient.)

Another thing to do before starting is to switch the platform to Android. To do this, go to File > Build Settings and select Android.
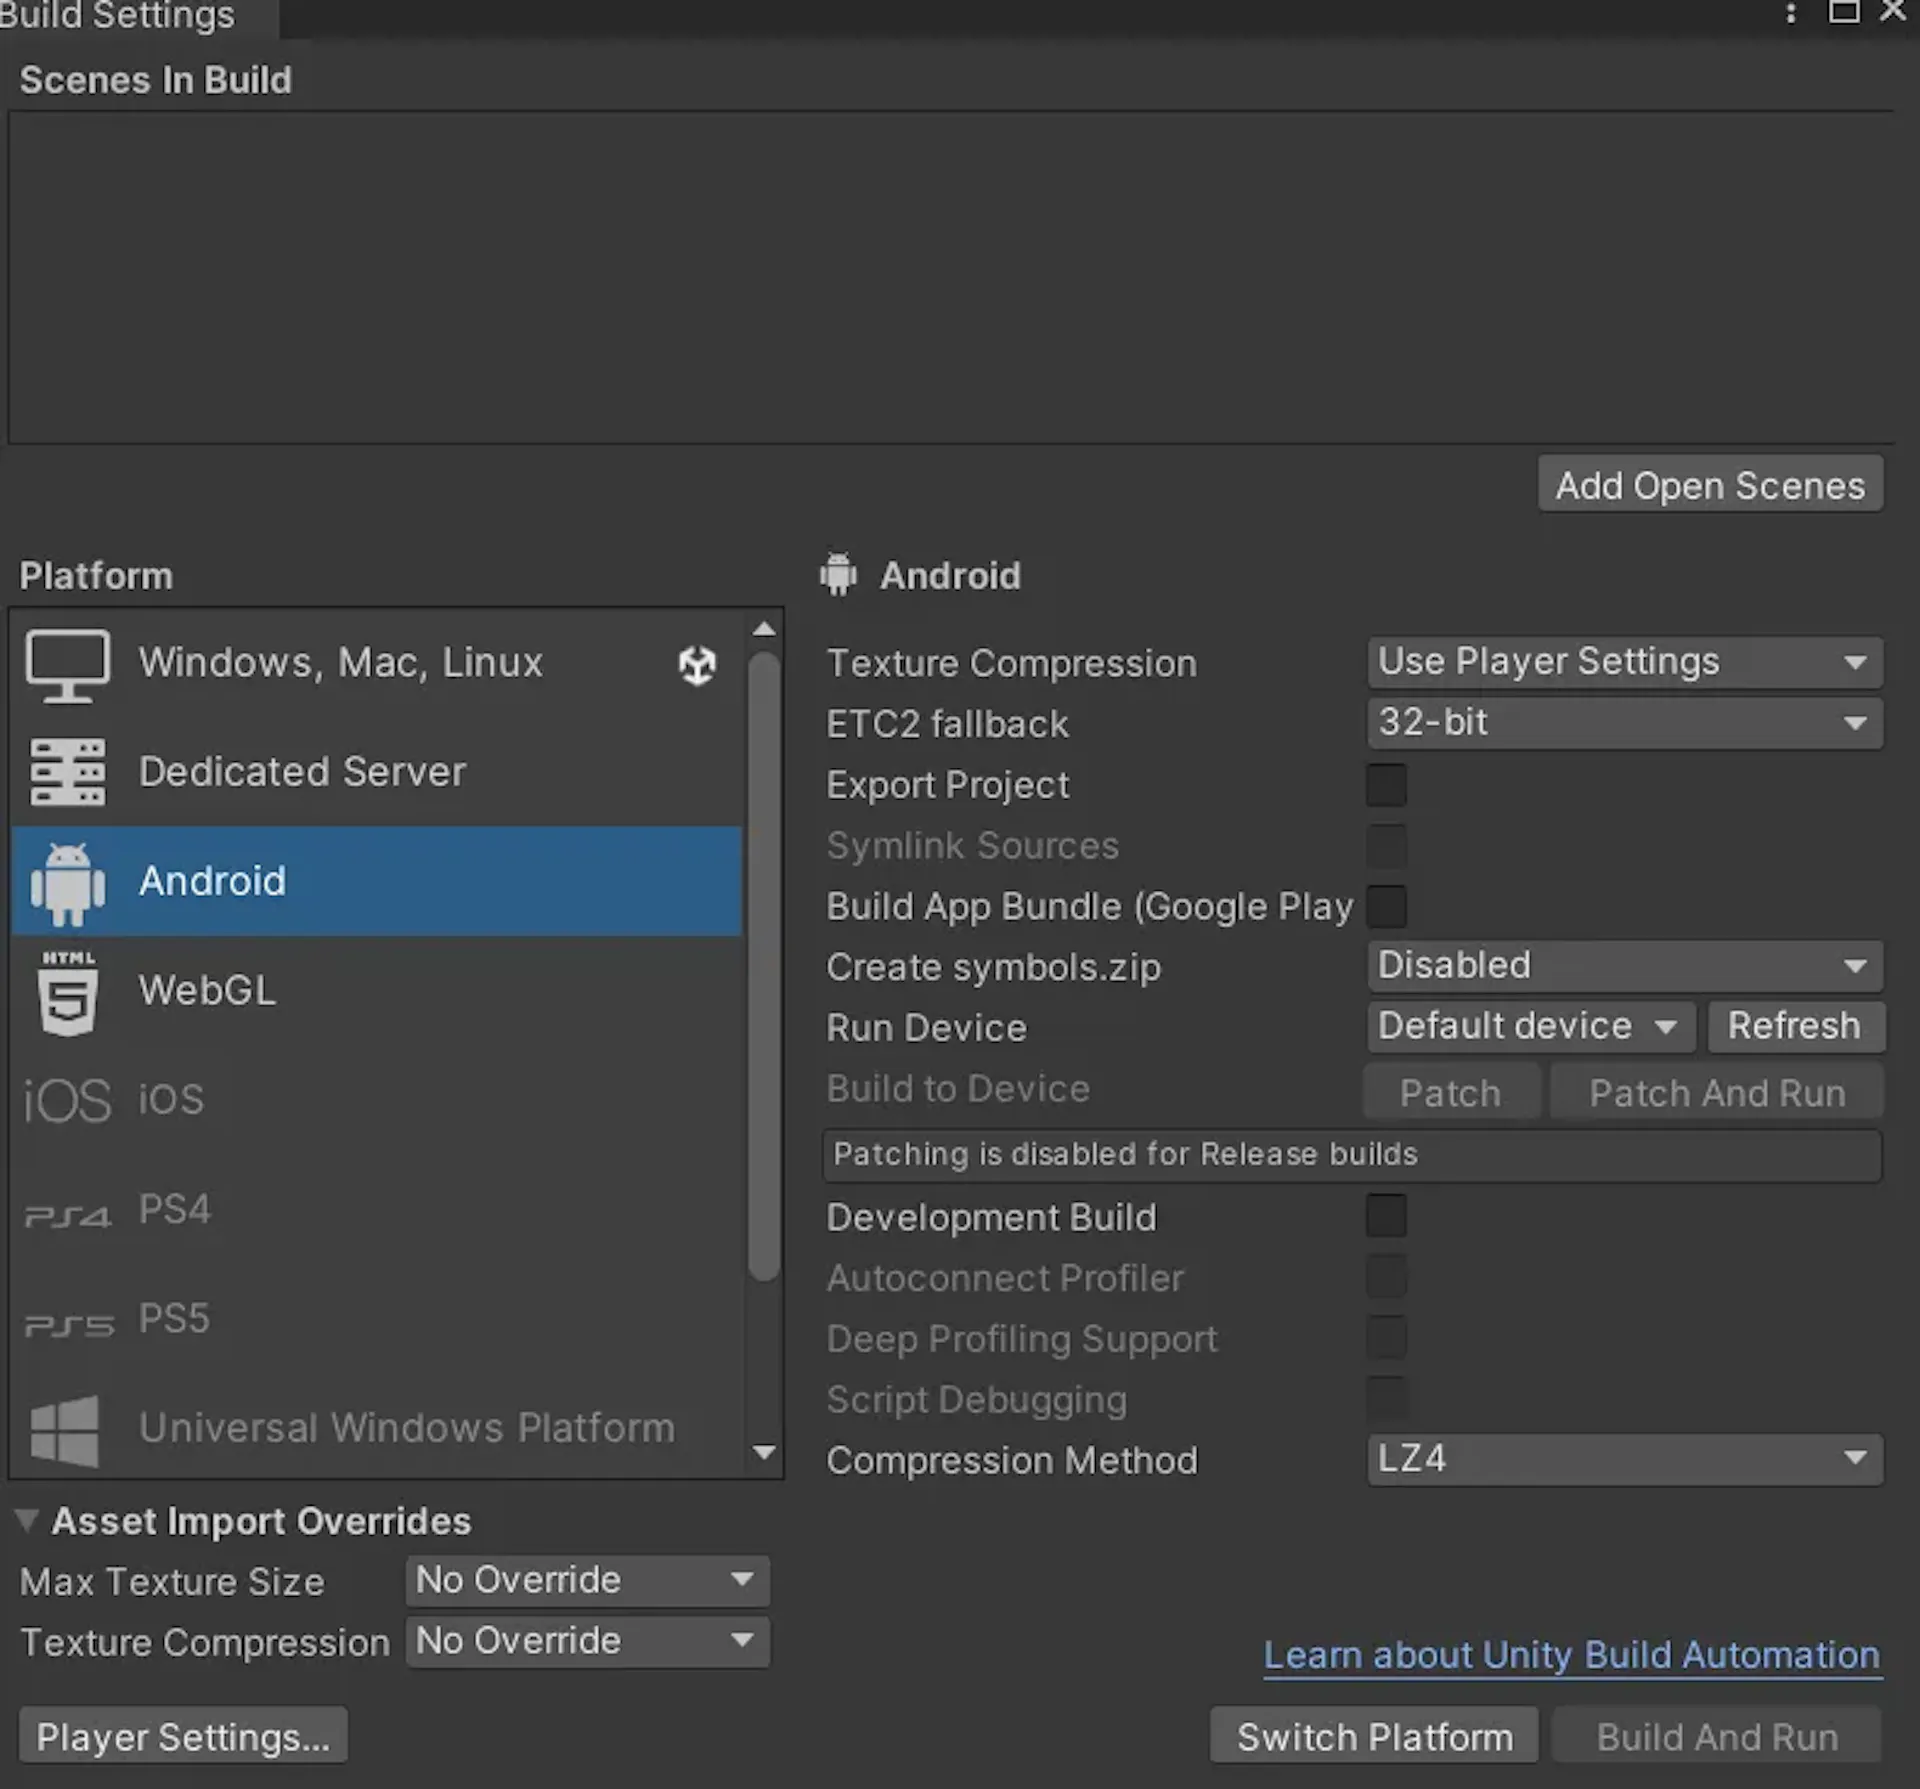
After switching the platform to Android, follow the video tutorial until you add the 3D object.
Let’s quickly review the steps you should take beforehand.
- Download and import Cesium and ARCore Extensions packages.
- Import the Geospatial sample.
- Set Project Settings (Android Version — API level 28, Scripting Backend — IL2CPP, uncheck ARMv7, check ARM64, uncheck Auto Graphics, and remove Vulkan).
- In XR Plug-in Management, enable Google ARCore.
- In ARCore Extensions, enable Geospatial and Geospatial Creator.
- Enable ARCore API and Map Tiles API for the new project in the Google Cloud console. Create and paste a new API key in Unity ARCore Extensions.
- Add one of the sample scenes. In my case, it’s Geospatial Arf 4. Drag it to the Hierarchy and remove any other objects.
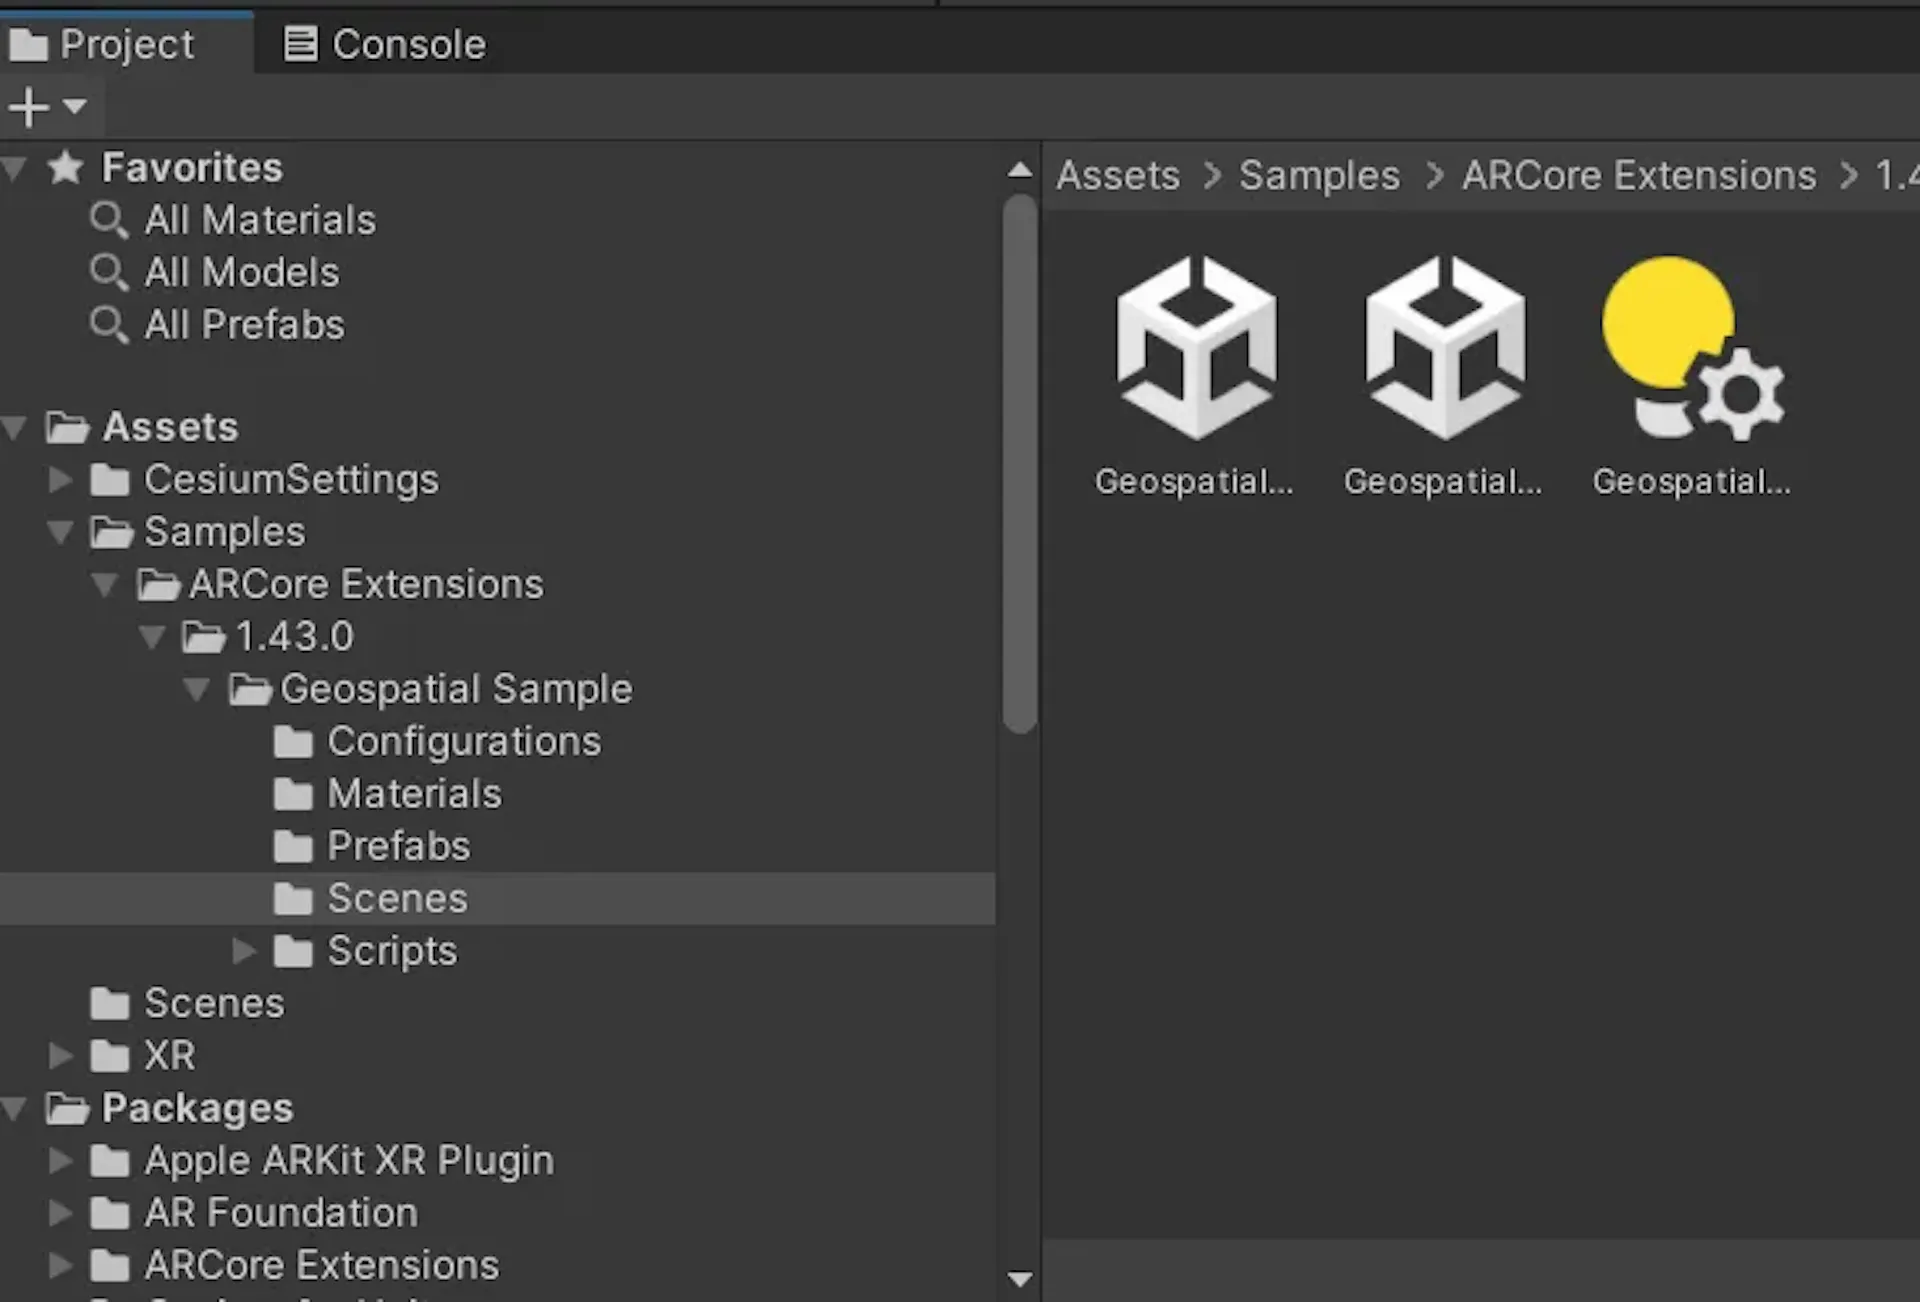
- Add AR Geospatial Creator Origin and set the API Key.
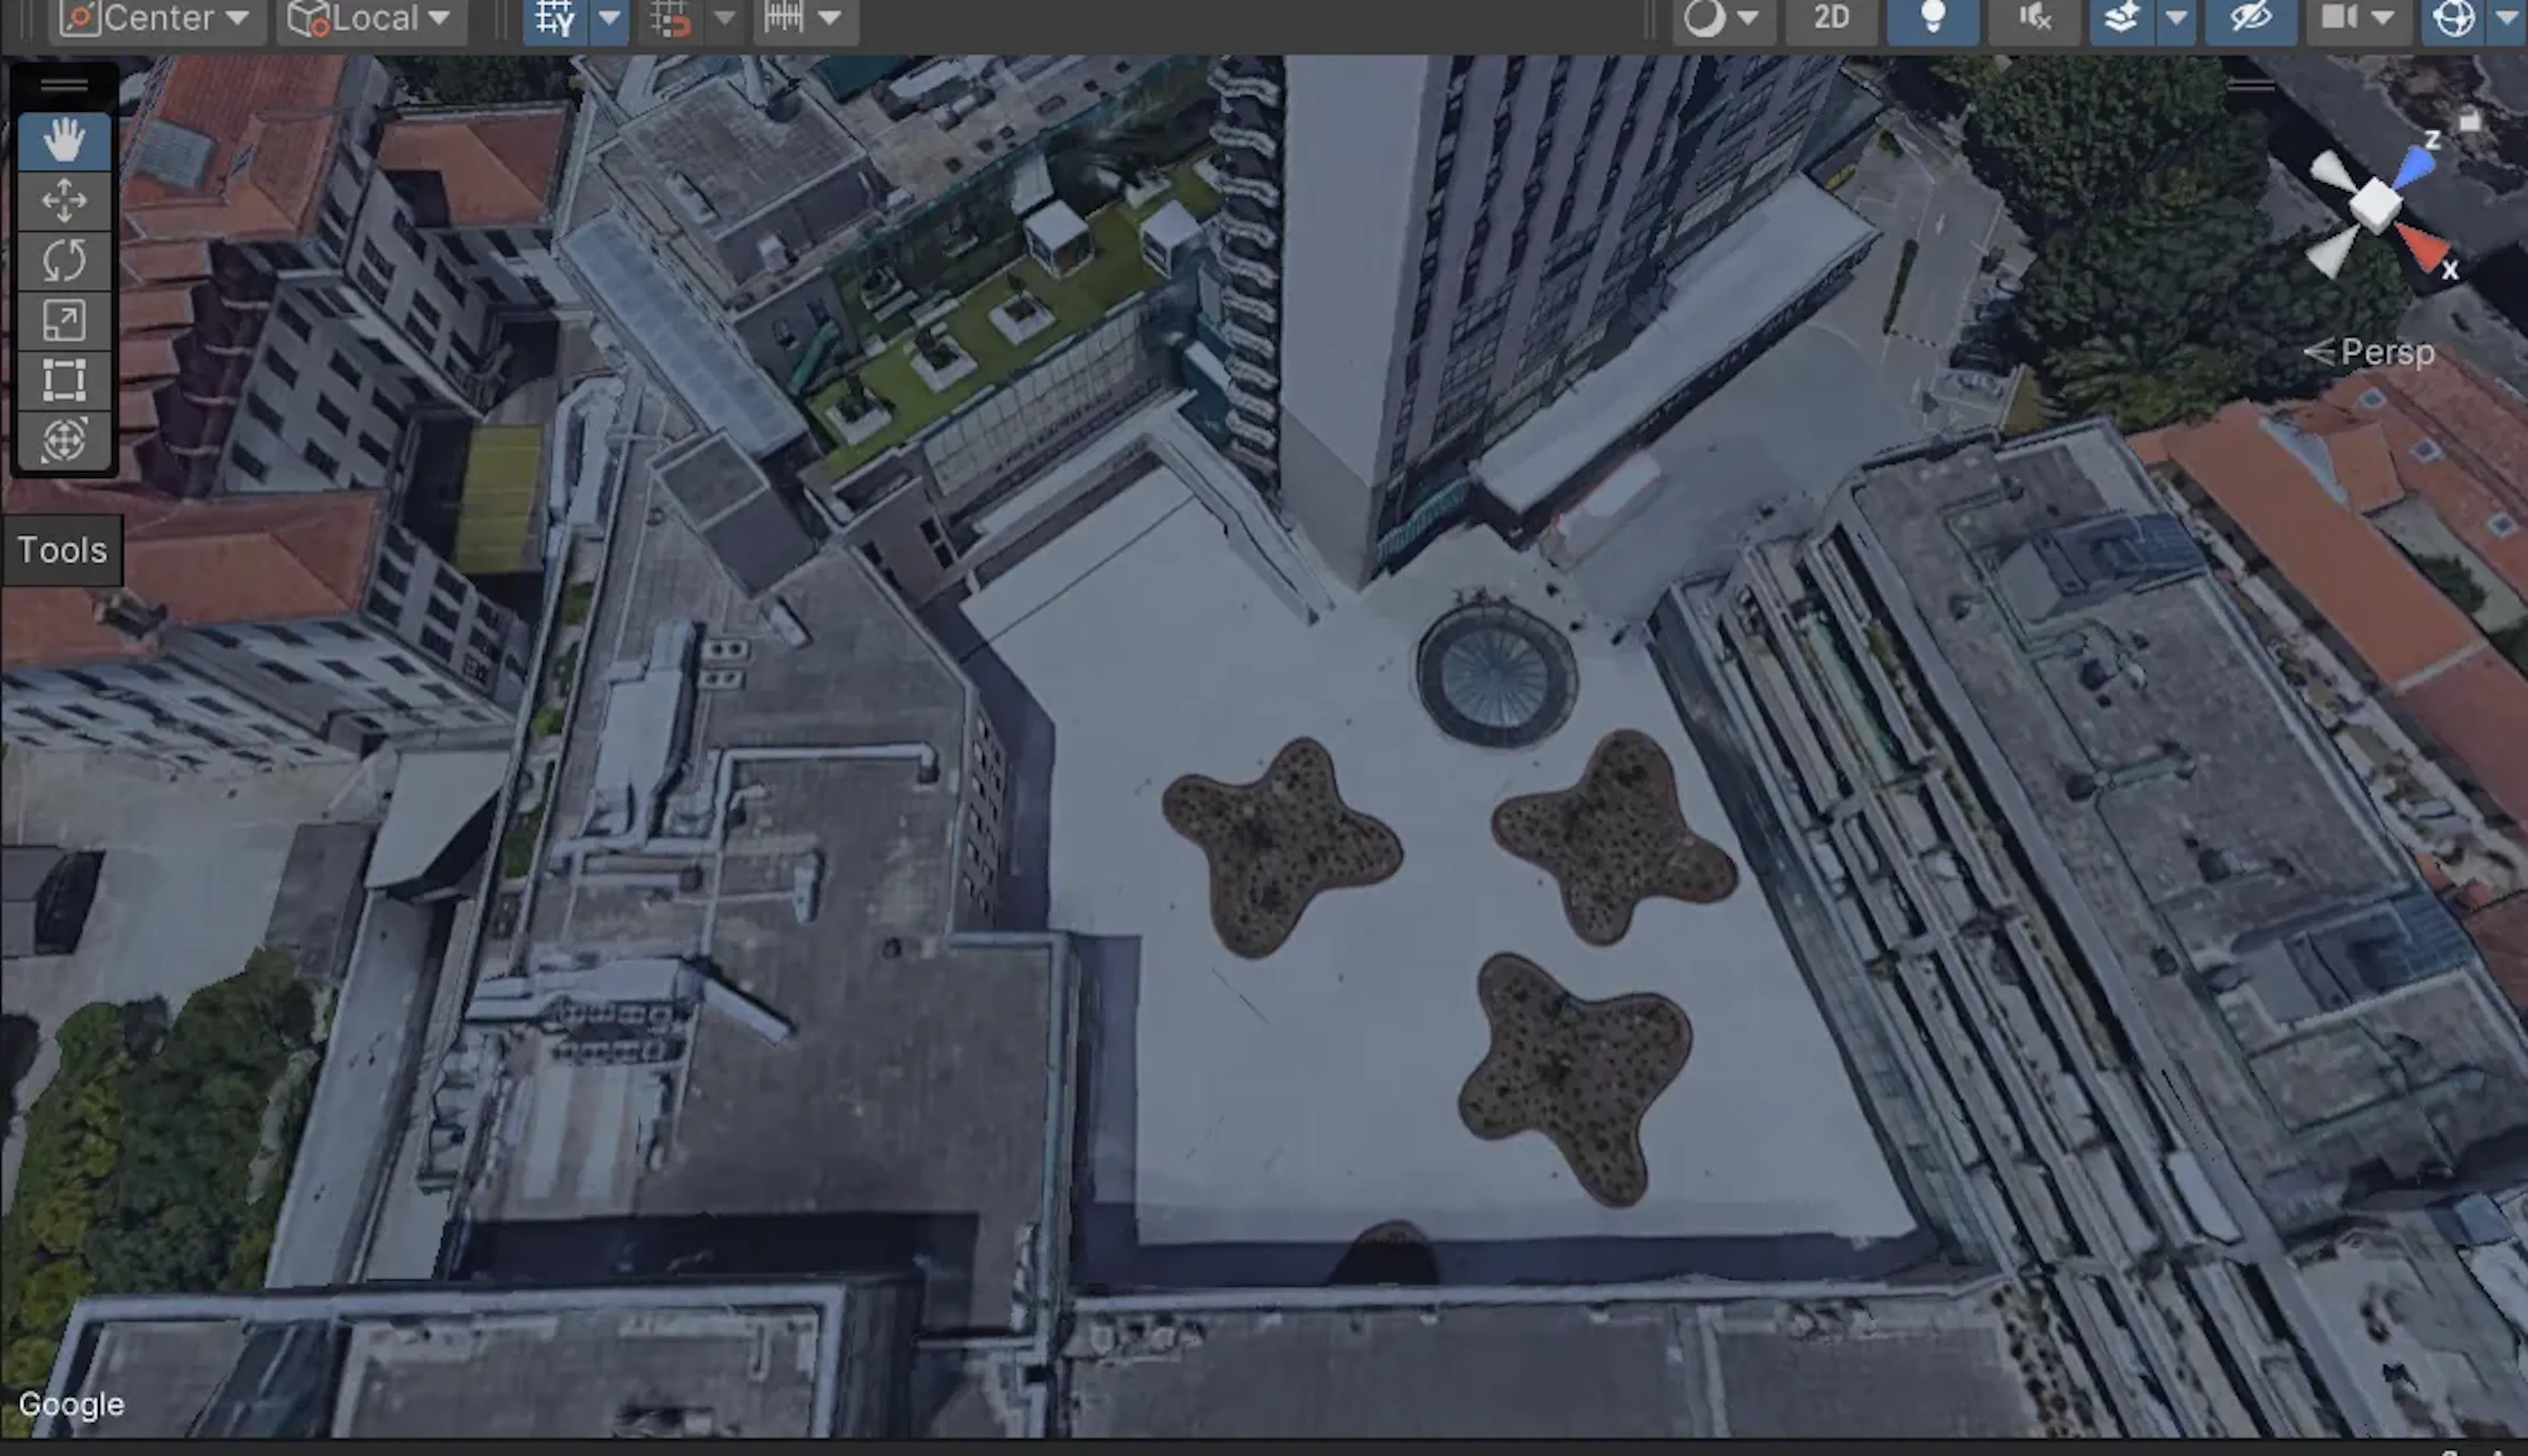
- Identify the point where you want to place your 3D object.
After that, you can turn off the video and continue following this guide.
Here’s what my chosen point on the map looks like:
3D Model integration
Now it’s time to choose a 3D model. Go to the Unity Store and download any model you wish. It’s better to register with the same account you used in Unity.
For this example, I use a free skeleton model.

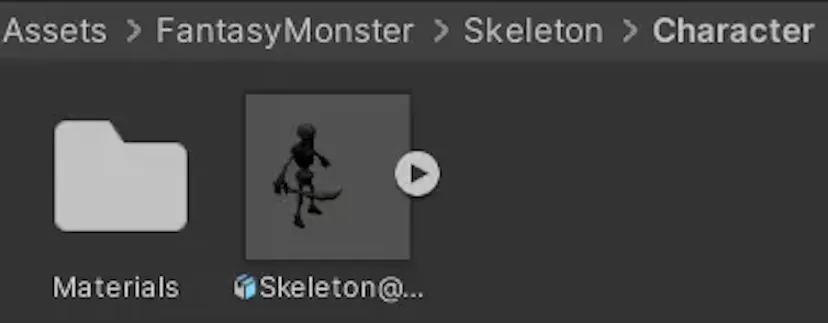
Click on Open in Unity then Download, and Import. Once finished you will see your model in the Project structure.
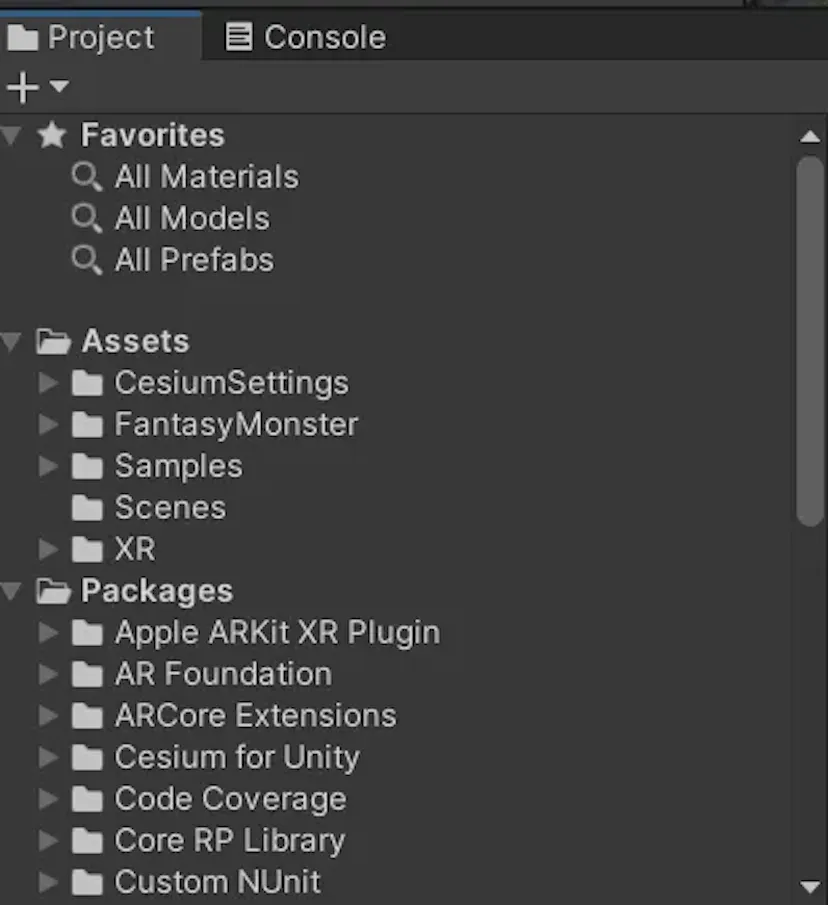
Find the 3D model and drag it to the Hierarchy
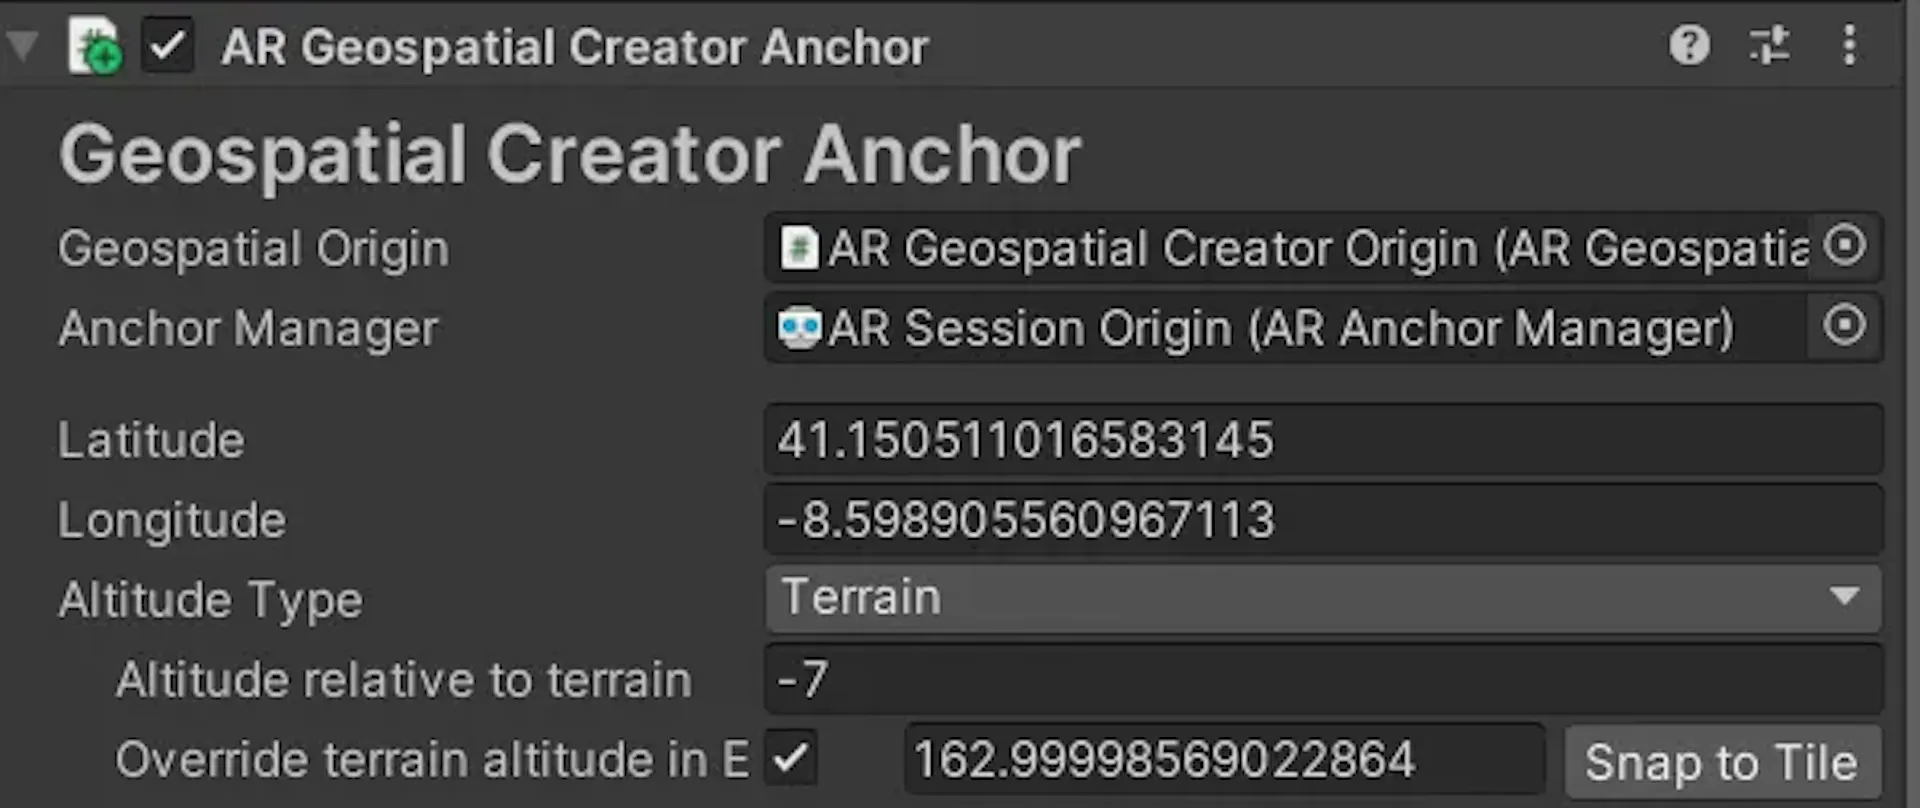
Initially, you won’t see the model on the map. To position it, click on the 3D model in the Hierarchy, then click on the Add Component button. Choose AR Geospatial Creator Anchor.
Adjust the position and scale of the model. Set the Terrain as the altitude type and input the longitude and latitude (in my case they are the same as AR Geospatial Creator with small changes). Set Altitude relative to terrain to zero. To view your model in the Scene you can play around with Override terrain altitude. If your model isn’t visible or appears to be floating after the build, adjust the Altitude relative to terrain. In my scene, a value of -7 worked best.
You should end up with something like this:
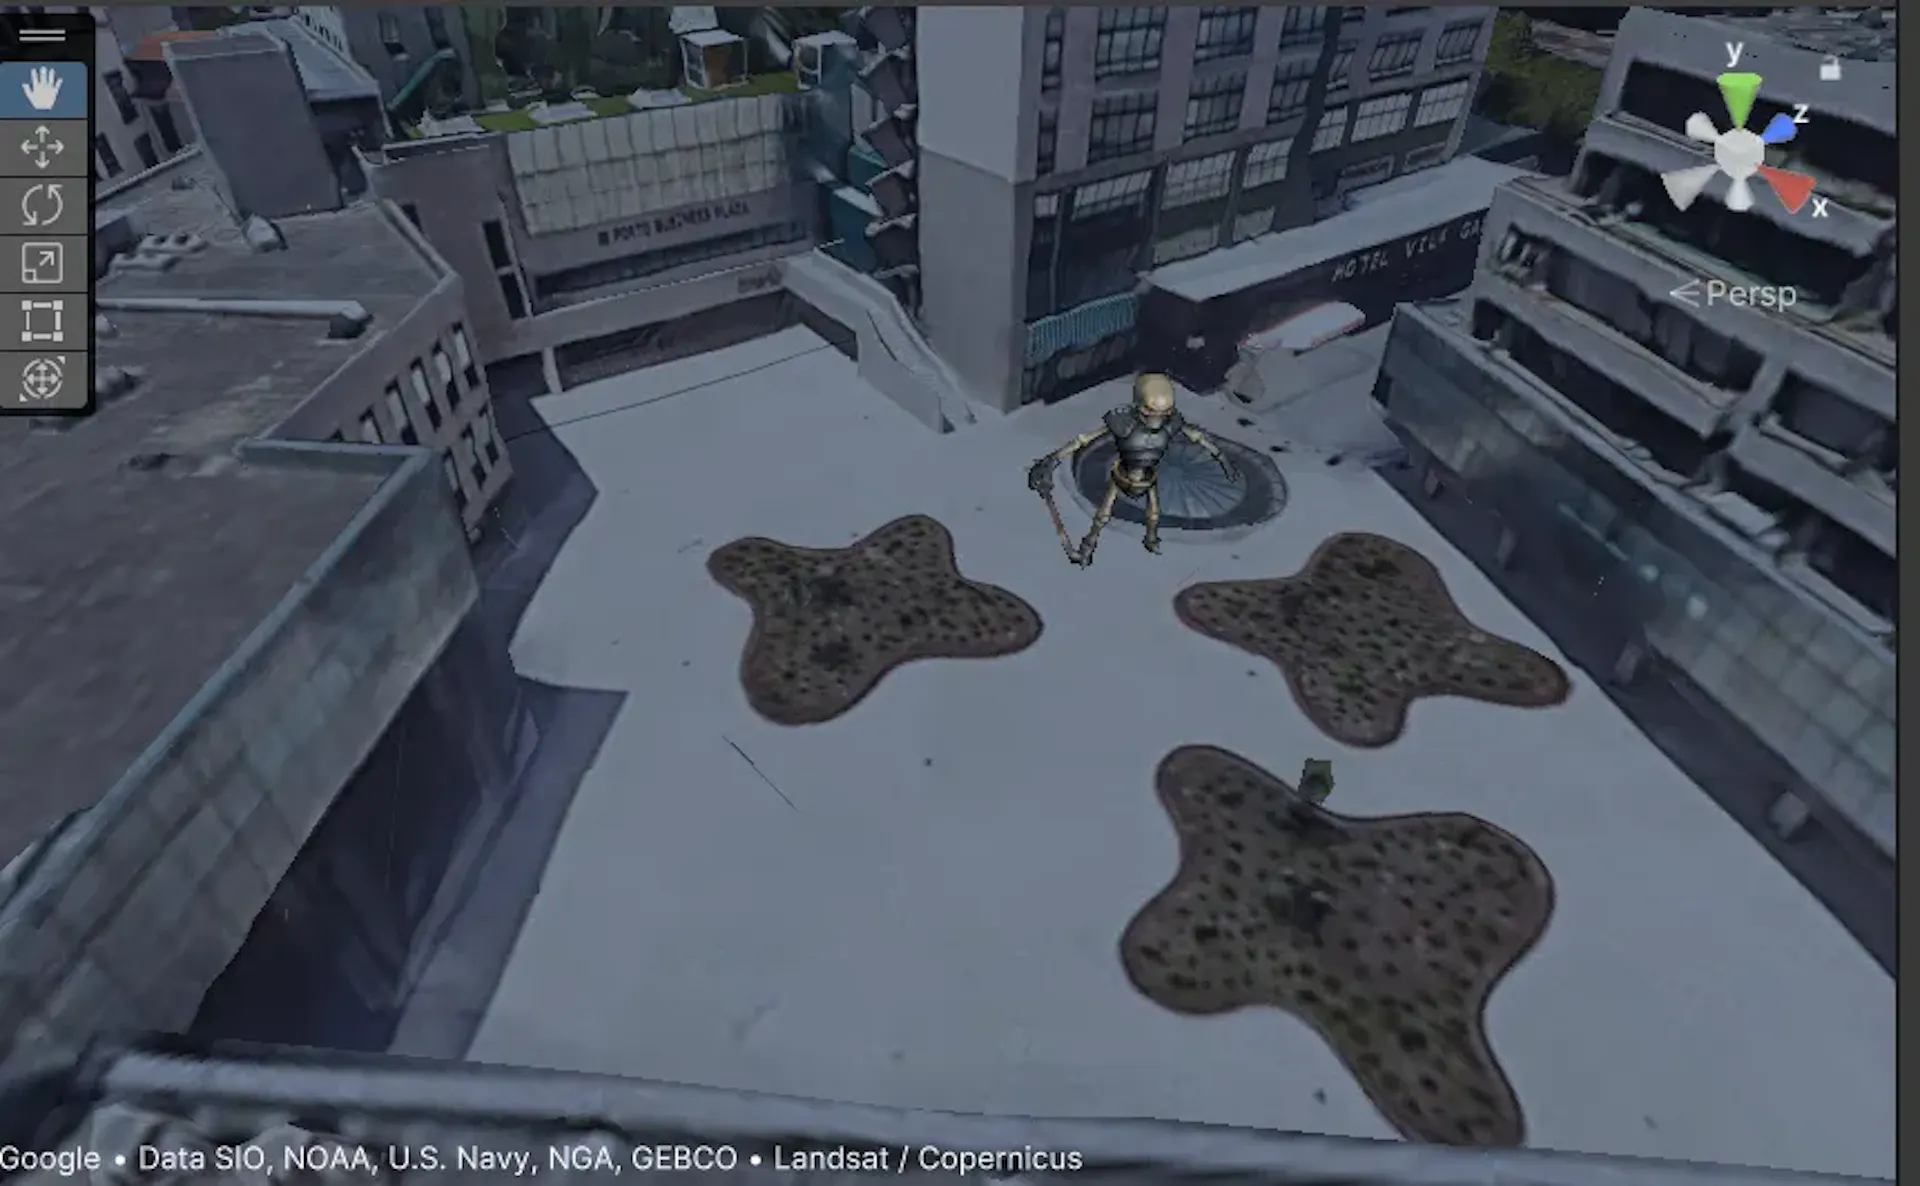
Scary, right?
Use the top-left corner buttons to rotate, scale, and transform your model. Adjust your “monster” as desired!
Add Animation
We’re almost there, but right now our model is static, let’s add some animation. For this, we need to use an Animation controller. Your project might already have an Animation Controller, but if not, you can create one by following these steps:
- Right-click on the folder containing your animation and select Create > Animator Controller.
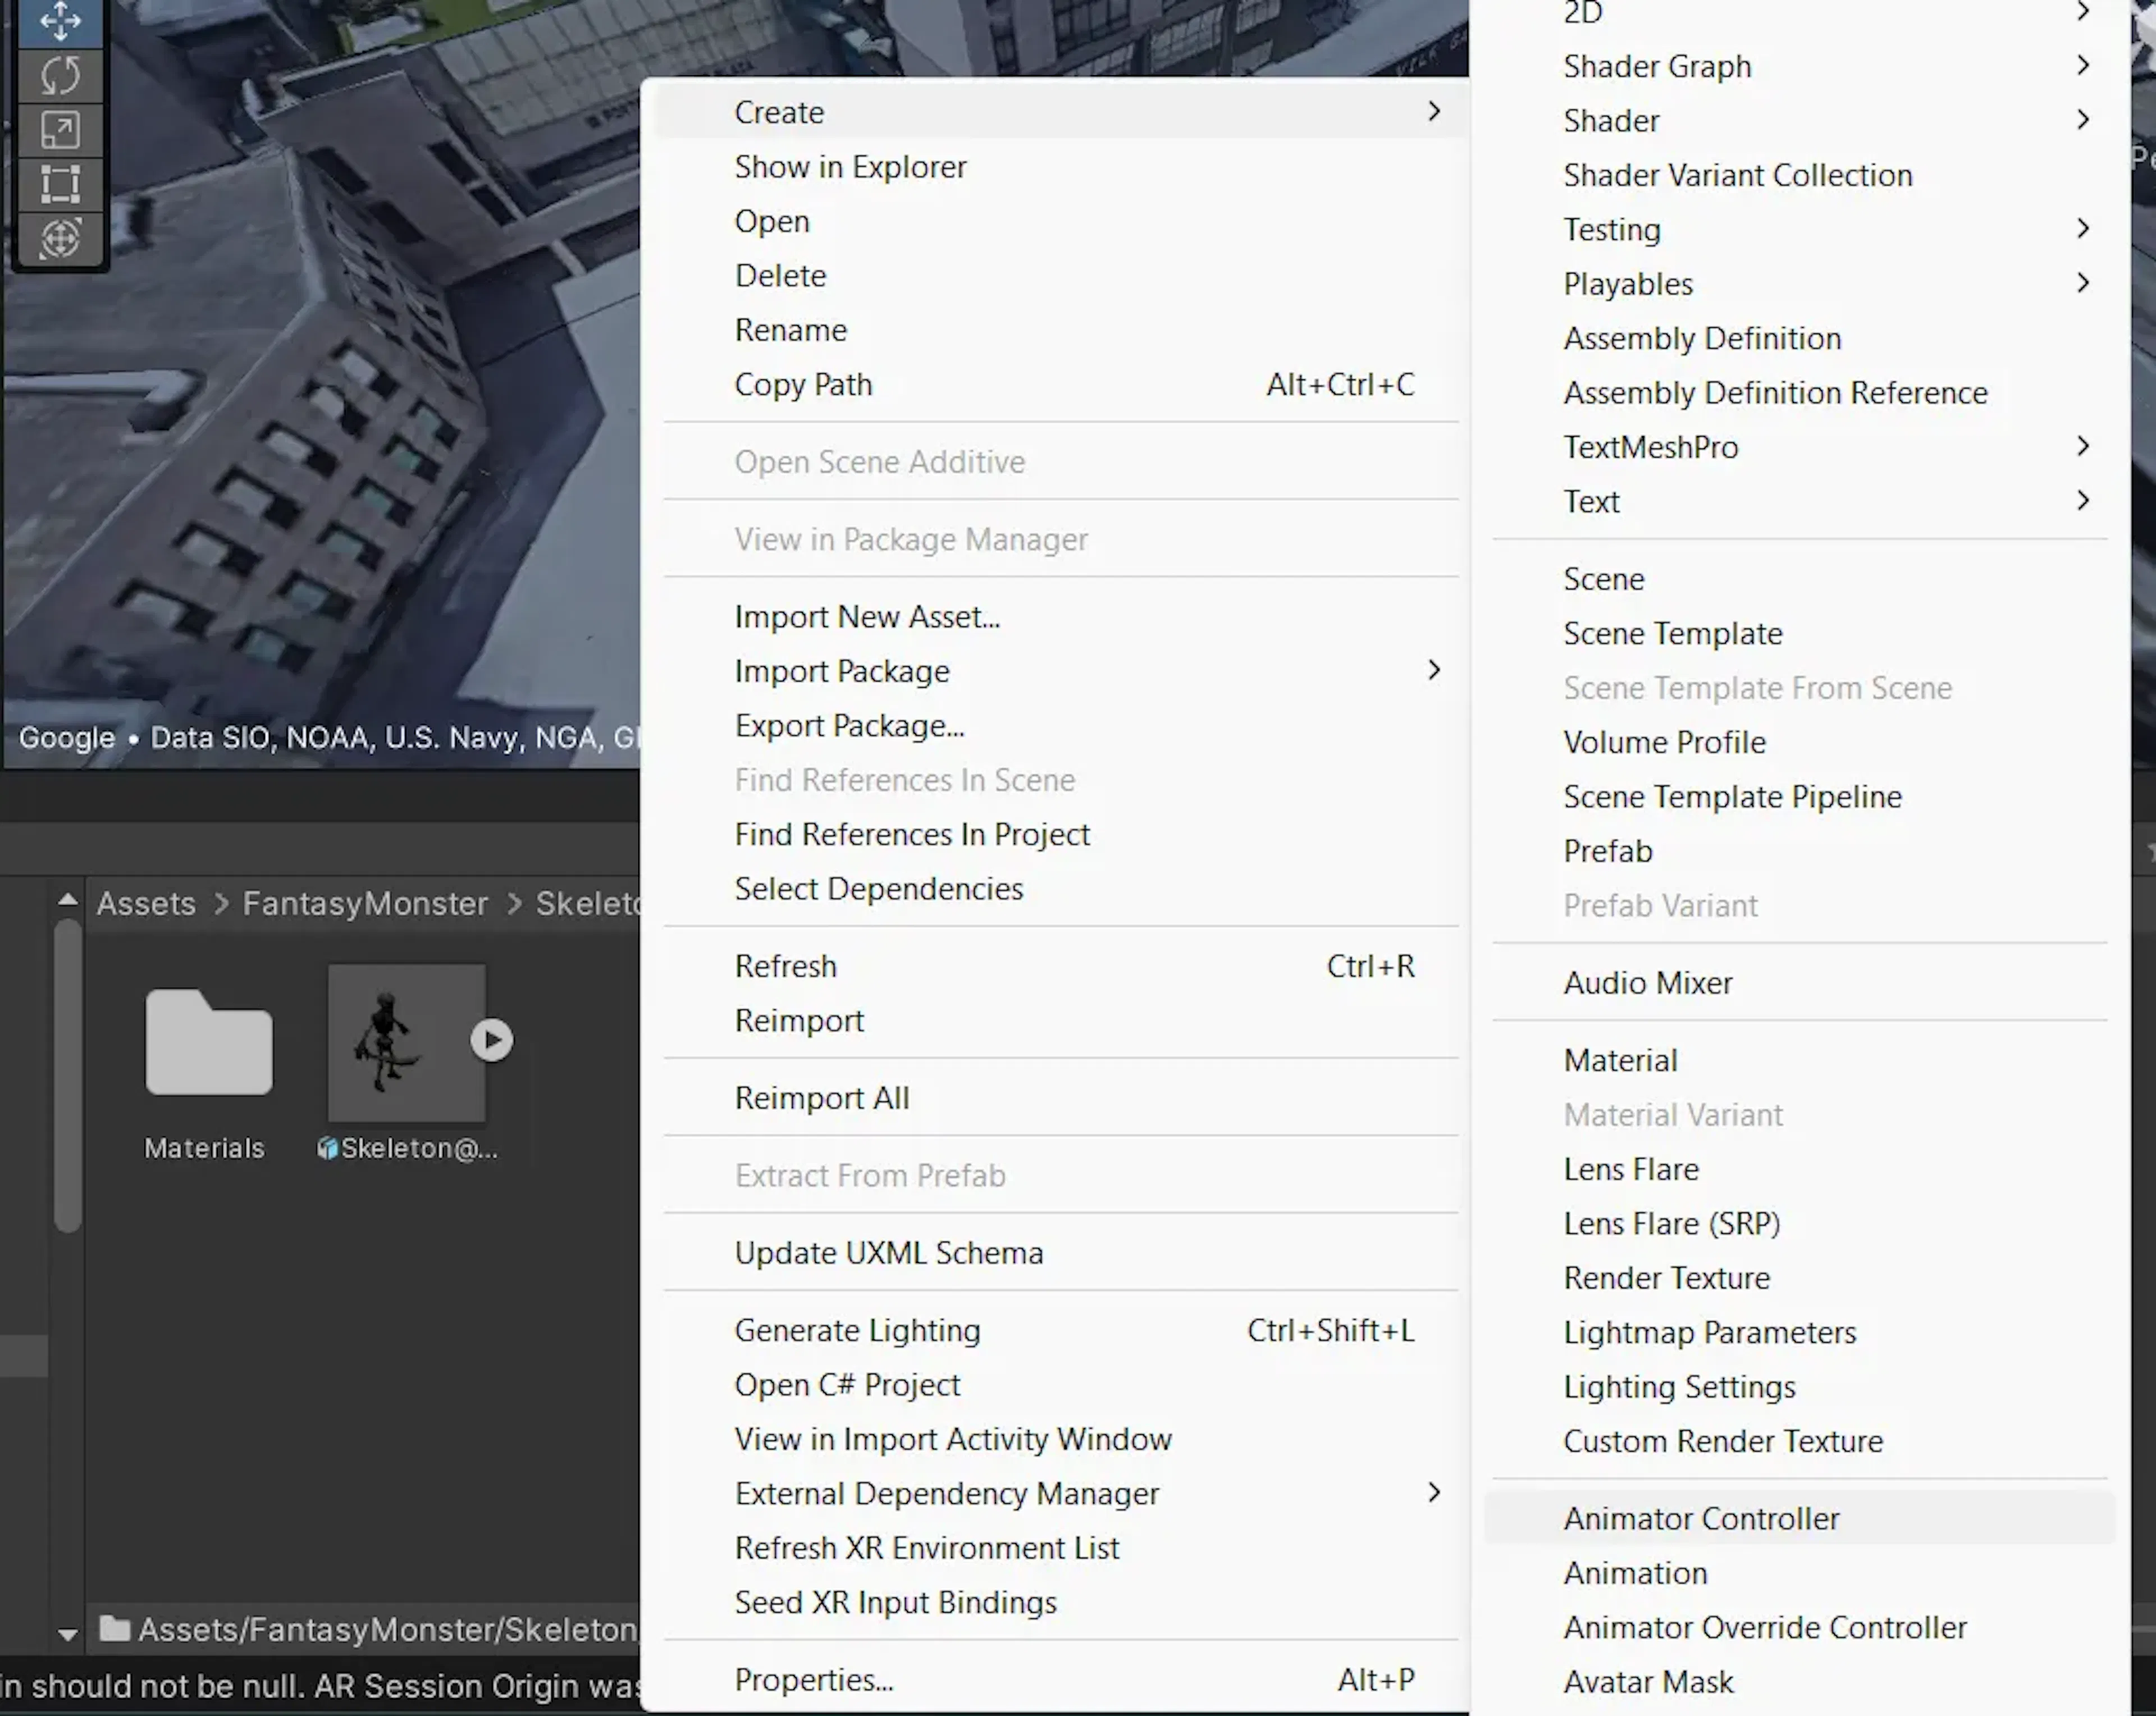
Animation Controller is what we need
2. Click on it. You should see a workspace where you can add animations.
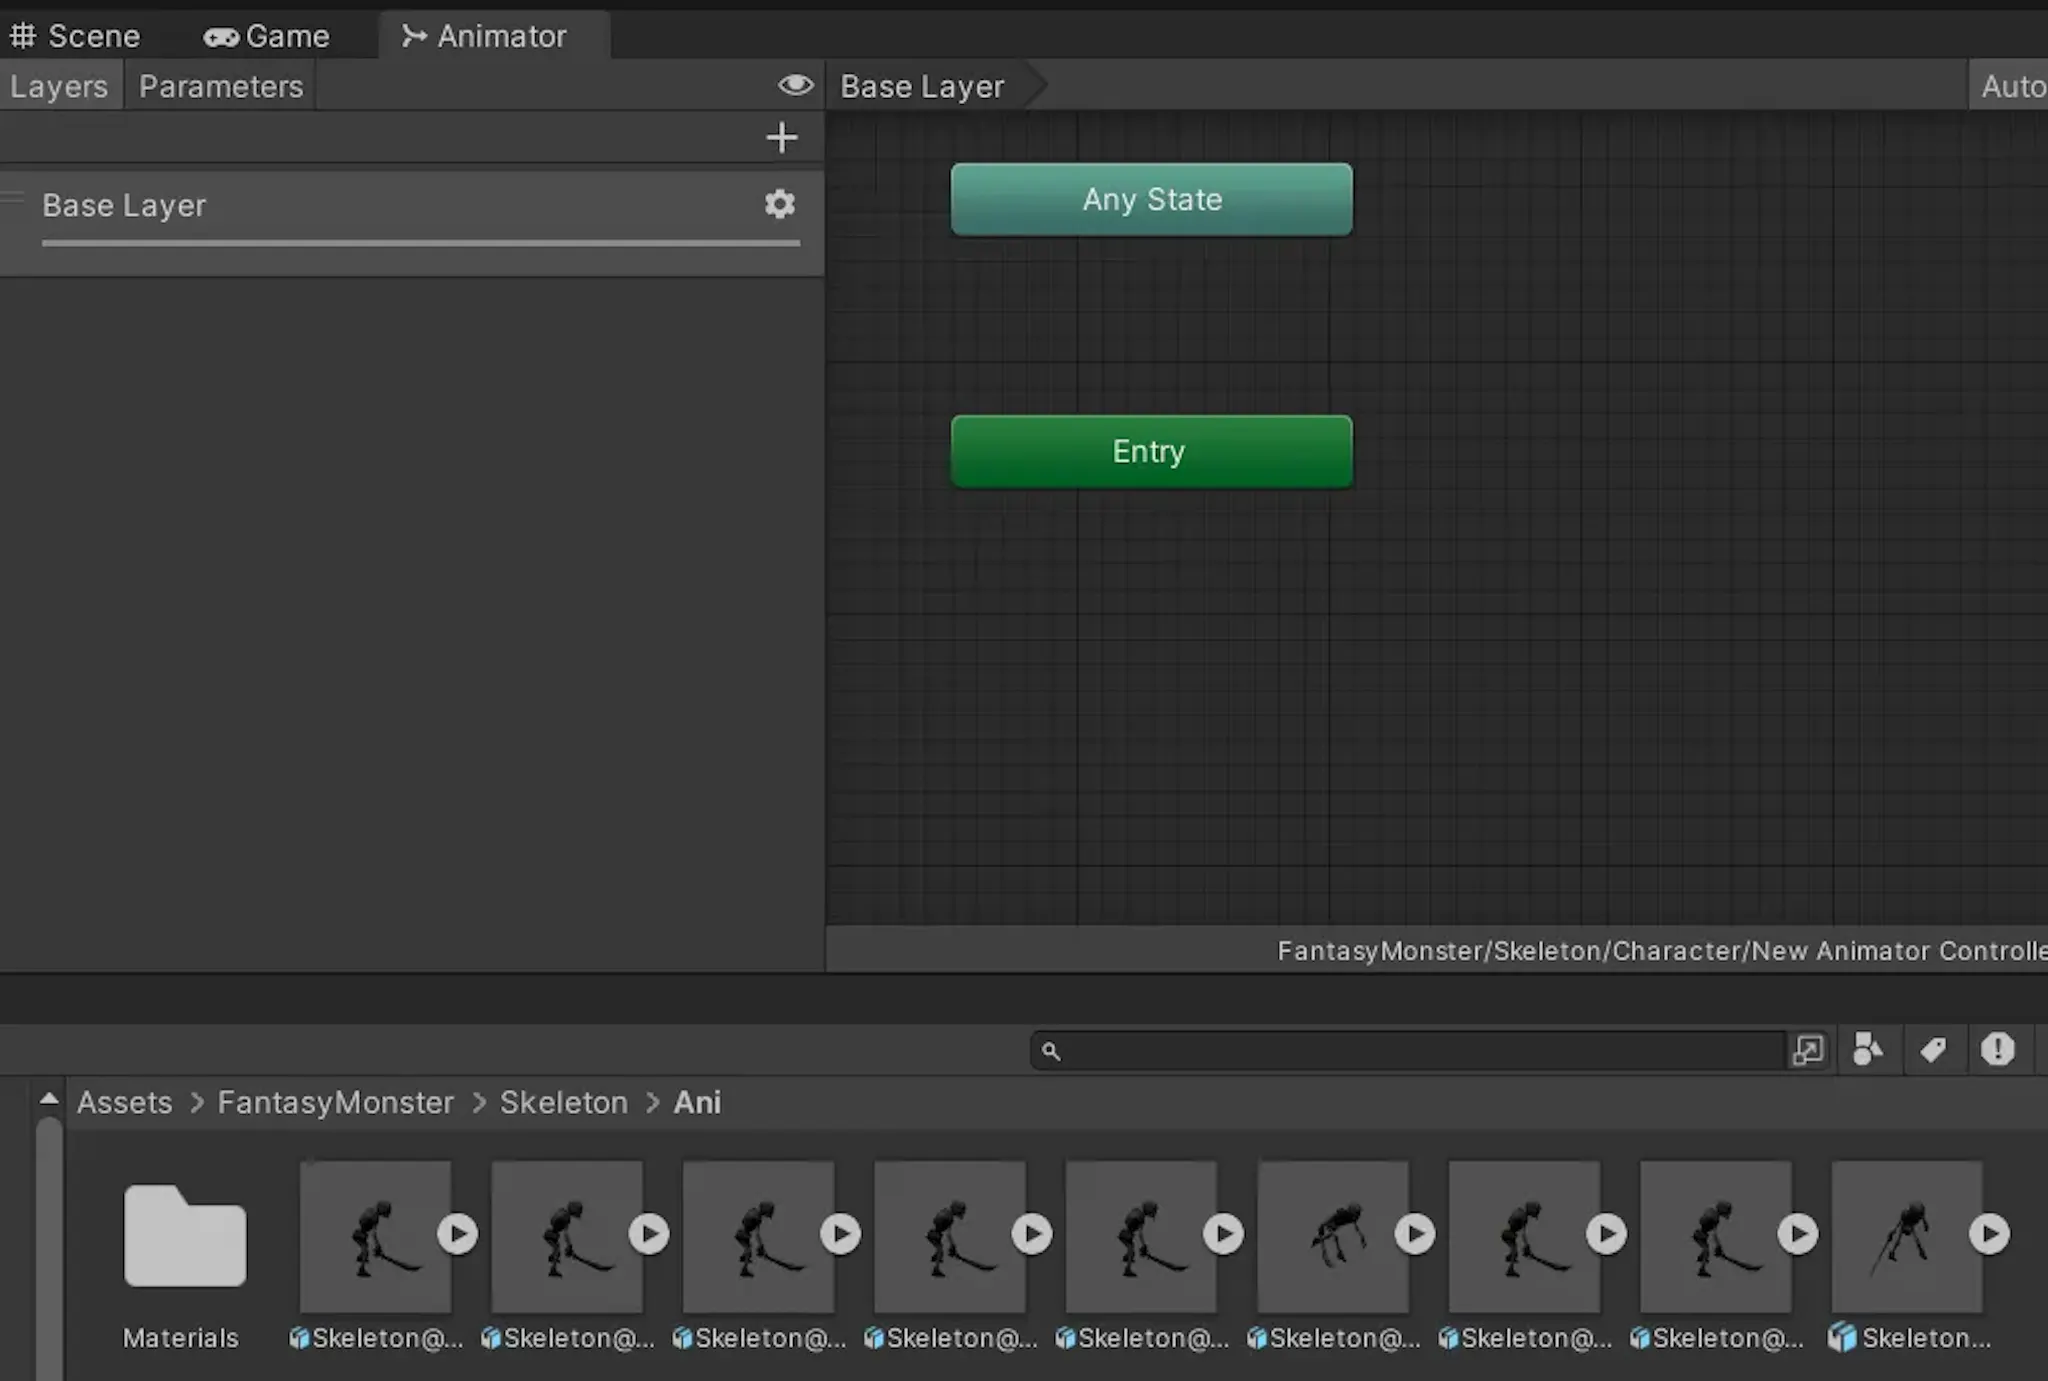
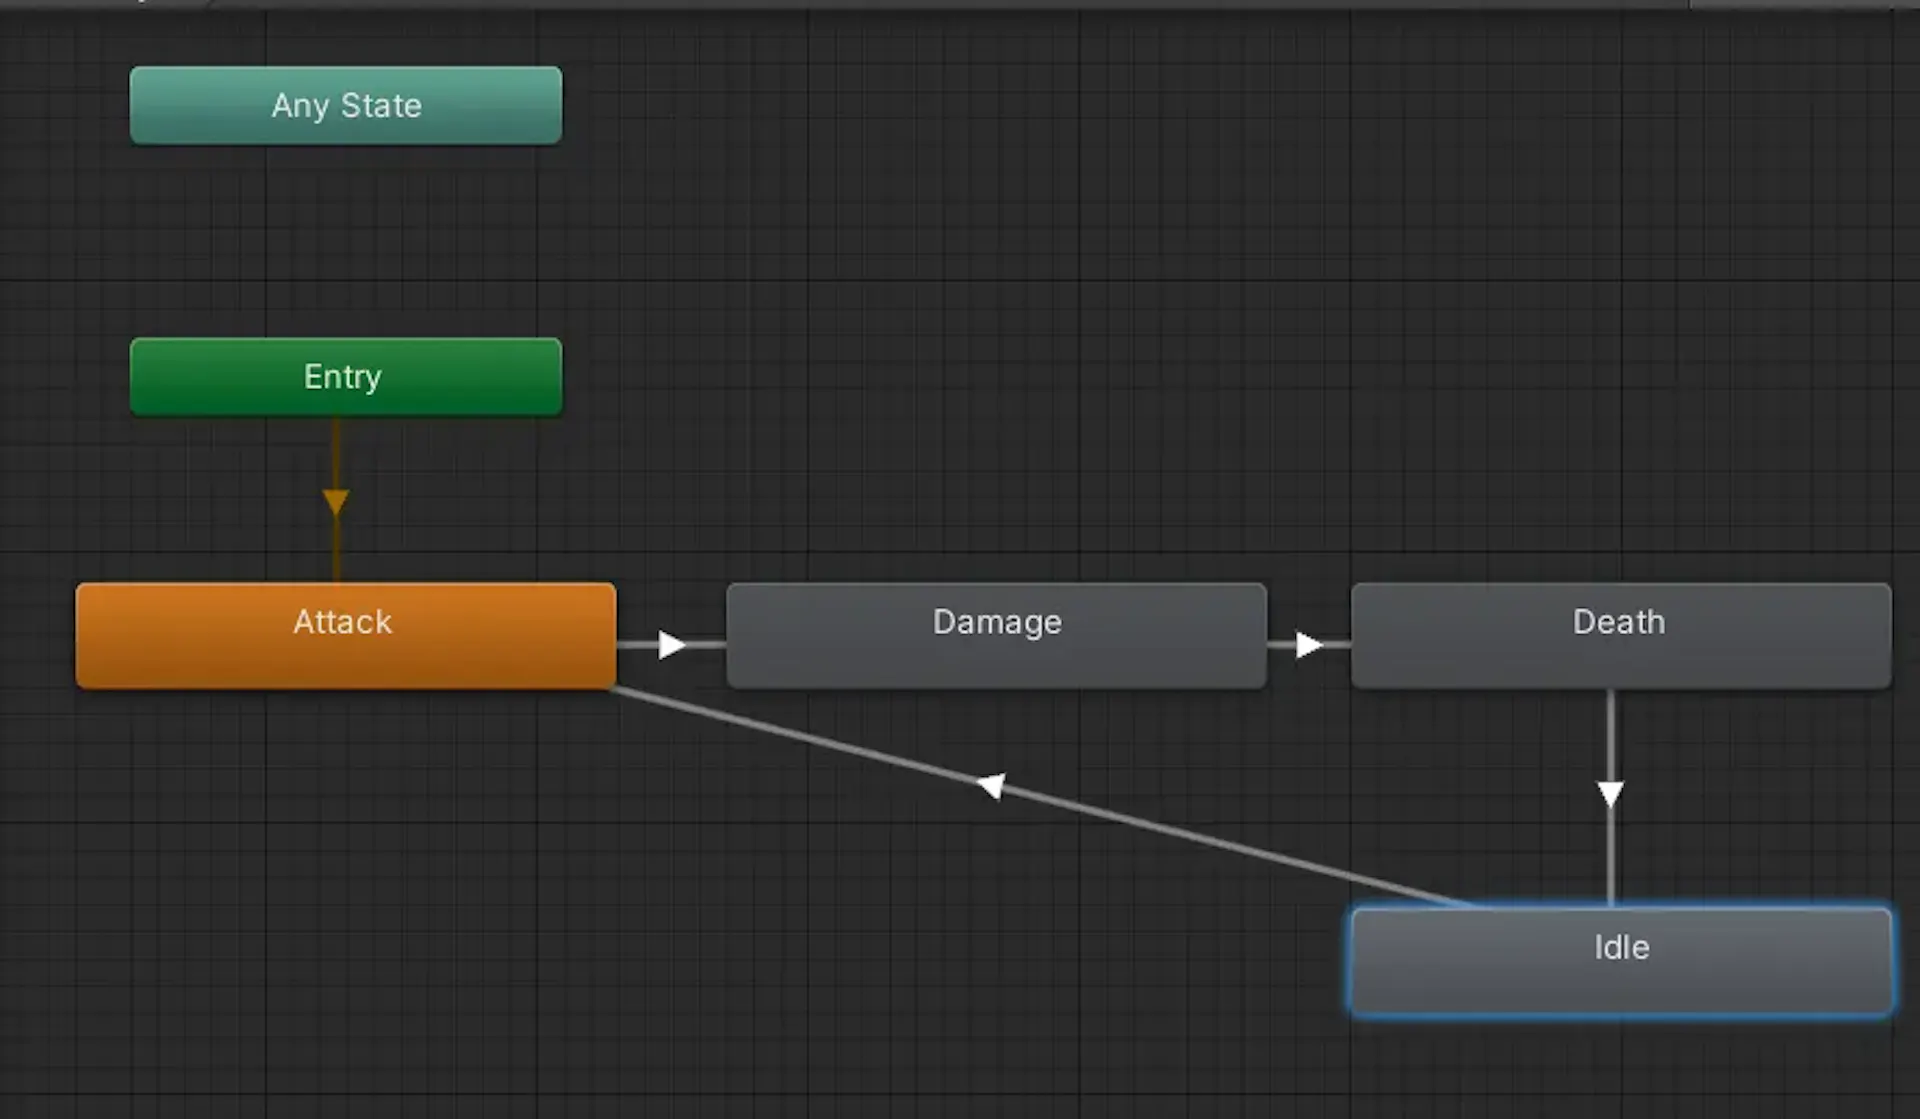
When you downloaded your model, it should have come with some animations. Search your folders for these animations. Drag the desired animations to the Base Layer. To connect animations, right-click on the animation and select Make Transition.
Go back to your 3D model in the Hierarchy. In the Inspector window, find the Animator component and assign your new Animation Controller to it.
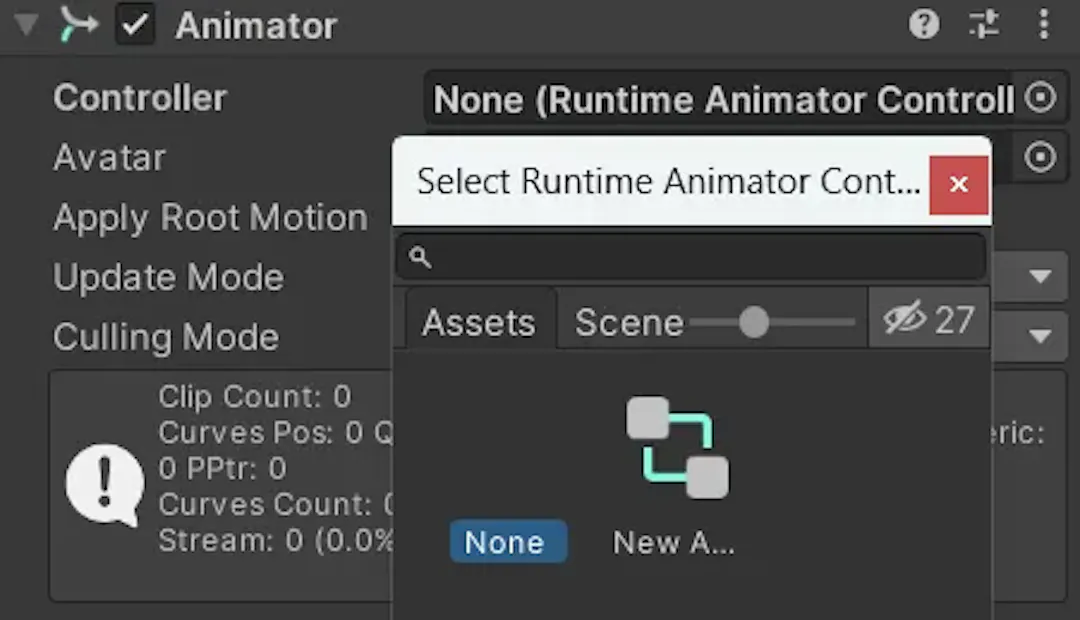
New A… is our new controller
Finally! We can run the build. You can try it, and maybe everything will work fine. However, I encountered an issue where my build always got stuck on “Scene 0…”. Be brave, my friend, I will show you a weird way to fix this issue.
Before building, go to Edit > Preferences and do everything according to the attached GIF. For some reason, Unity doesn’t see its dependencies, and you need to trigger them manually. (Link where I found the answer)

I was laughing as a child after that bugfix!
The final step is to go to File > Build Settings and click on Build. Save your .apk and install it on a test device. Go to the location where you placed your model and you should see the magic.

Importing Unity as a library to Android project
Create a new Android project and within it, create a folder where you will import your Unity project (e.g. unityAr). Ensure the minSdk version is the same as the Unity project (API 28).
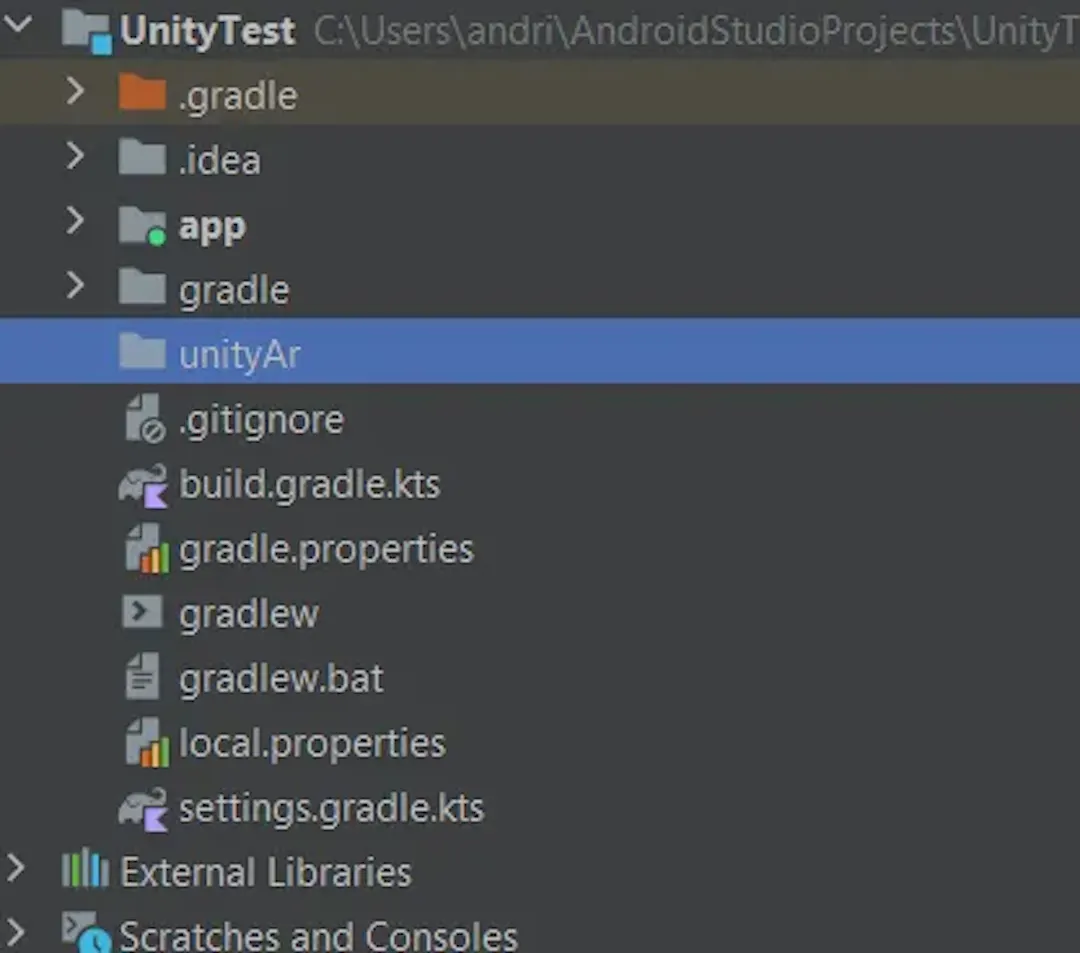
In unityAr, we will import the Unity Project
The next step is crucial, it could save you hours or days of bug-solving. In Unity, go to Assets > External Dependency Manager > Android Resolver > Delete Resolved Libraries.
In Android Resolver uncheck Enable Resolution On Build.

Why this step? If you skip this step, you may end up with unnecessary dependencies and outdated Android libraries that require updates or removal. Simply enabling Jetifier won’t solve these issues, and each new fix could introduce more bugs. Following this step ensures a smoother integration. (Link where I found the answer)
After this open Build Setting, check Export, and click on Export Button. Choose a previously created directory (e.g. unityAr).
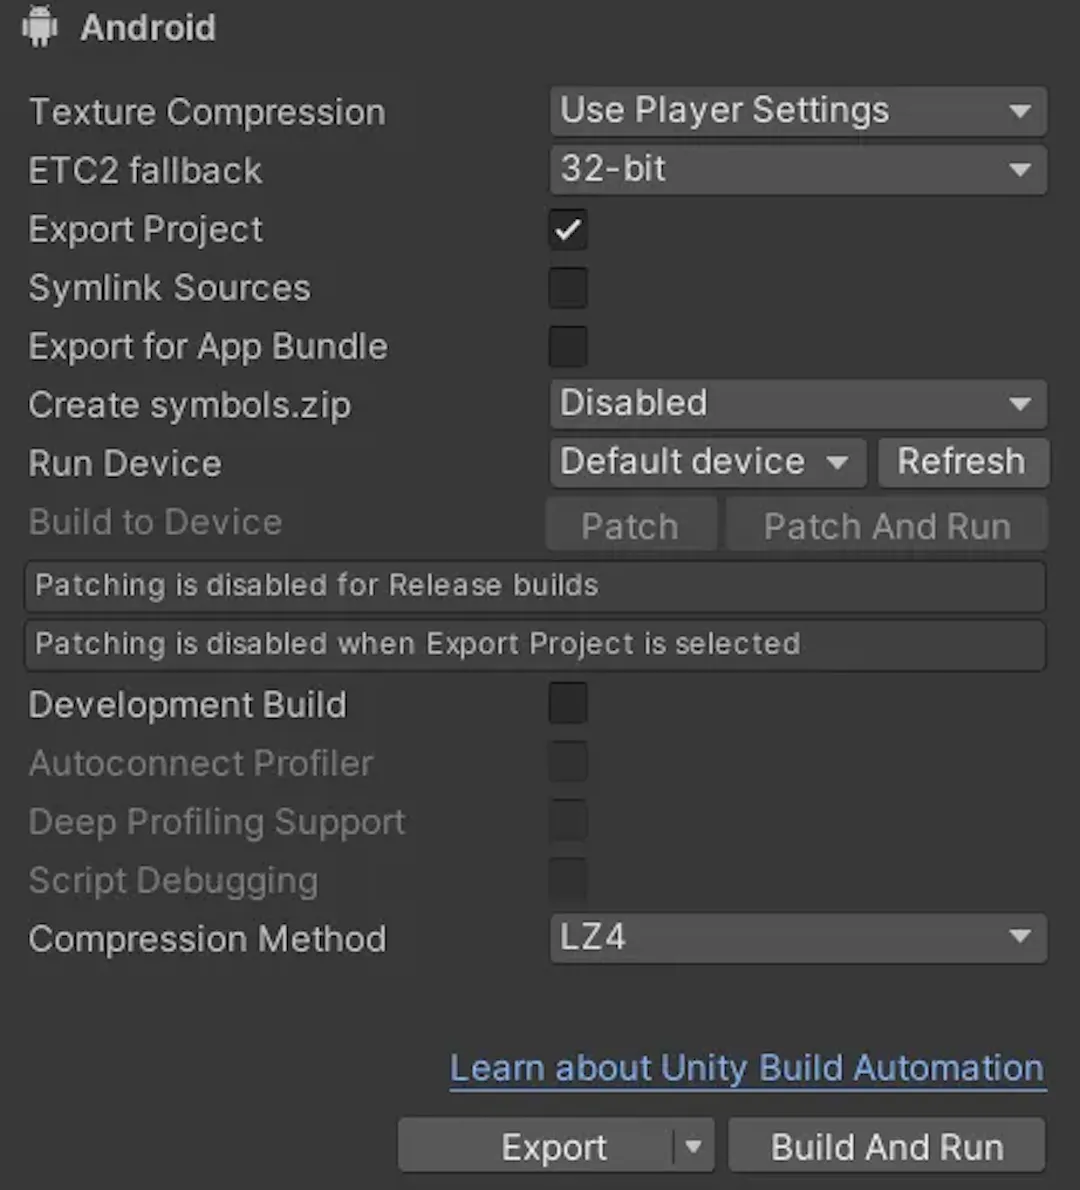
Now you can close Unity, the next steps will be only in Android Studio.
Firstly, include the unityLibrary in your project in settings.gradle. Look carefully at the names of your project and unity folder.
dependencyResolutionManagement {
    ...
    repositories {
        ...
        flatDir {
            dirs("${rootDir}/unityAr/unityLibrary/libs")
        }
    }
}
rootProject.name = "UnityTest"
include(":app", ":unityLibrary")
project(":unityLibrary").projectDir = File(rootProject.projectDir, "unityAr/unityLibrary")

include(":unityLibrary:xrmanifest.androidlib")
Next, add this line to gradle.properties .
unityStreamingAssets=.unity3d, google-services-desktop.json, google-services.json, GoogleService-Info.plistSince you’re using a new Gradle plugin version, add namespaces to the Gradle files. Find the package name inside the appropriate Manifest.xml and add these lines accordingly:
defaultConfig {
        namespace "com.unity3d.player"
        ...
}
defaultConfig {
namespace "com.UnityTechnologies.XR.Manifest"
...
}In build.gradle for the app module, add:
dependencies {

    implementation(project(":unityLibrary"))
    implementation(fileTree(mapOf("dir" to "${rootDir}/unityAr/unityLibrary/libs", "include" to listOf("*.jar"))))
    ...
}
After that, if you try to build the project you could face this issue:

For some reason, Unity doesn’t see NDK. Open build.gradle in the unityLibrary folder and change this line :
commandLineArgs.add("--tool-chain-path=" + android.ndkDirectory)to the direct path of the Unity pre-installed NDK (your path may vary).
commandLineArgs.add("--tool-chain-path=" + "C:/ProgramFiles/Unity/Hub/Editor/2022.3.28f1/Editor/Data/PlaybackEngines/AndroidPlayer/NDK")Now we can even try to run the app (don’t do that, there are still a few issues). I’ve added this simple code to launch the Unity activity
Greeting("Android", modifier = Modifier.clickable {
 this@MainActivity.startActivity(Intent(this@MainActivity, UnityPlayerActivity::class.java))
})
After clicking the app will crash with the next exception:
java.lang.RuntimeException: Unable to start activity ComponentInfo{com.vero.unitytest/com.unity3d.player.UnityPlayerActivity}: android.content.res.Resources$NotFoundException: String resource ID #0x0To fix it we need to add a string to strings.xml
<string name="game_view_content_description" translatable="false">Game view</string>If you run it again, the app won’t crash but the screen will be black, and in logs, you will see something like this
ARCoreError: third_party/arcore/ar/geo/geoar_module.cc:237 [type.googleapis.com/util.ErrorSpacePayload='ArStatusErrorSpace::AR_ERROR_GOOGLE_PLAY_SERVICES_LOCATION_LIBRARY_NOT_LINKED']Just add this library to the unityLibrary build.gradle
implementation 'com.google.android.gms:play-services-location:21.2.0'And … Victory! My friend, victory!

Unity project launched after text click (I’m dead again!)
Conclusions
In this article, we learned how to create an ARCore (Geospatial) project in Unity and integrate it into an existing Android app. This approach opens up many possibilities for future projects. Now, any Unity feature can be exported into Android, making it feel like an entirely new universe accessible with just a few hours of effort.
